Docker Kubernetes Hands-On Tutorial
Based on Materials from:
Docker Documentation
EDX: Introduction to Containers, Kubernetes, and OpenShift
EDX: Introduction to Cloud Computing
Udemy: Docker & Kubernetes: The Practical Guide
This hands-on tutorial discusses containerization of software applications with Docker and Kubernetes. It provides a step-by-step description (with sample projects) on how to package an application as a container. All the sample projects can be accessed here.
Section 1: The Basics
Docker is a famous container engine which allows users to create and manage containers. On the other hand, A container is a standardized independent unit or module of a software (Application code + Dependencies). Docker facilitates development, shipping, and running of software applications across different environments.
Docker architecture
Docker employs a client-server architecture. The client side accepts inputs from users and then talks to the Docker Daemon (or dockerd), which does the heavy lifting of building, running, and distributing your Docker containers. The Docker client and daemon can run on the same system, or you can connect a Docker client to a remote Docker daemon. The Docker client and daemon communicate using a REST API, over UNIX sockets or a network interface. Another Docker client is Docker Compose, that lets you work with applications consisting of a set of containers.
Docker Installation
Install Docker by following the steps specific for your operating system. Also, you can Play Around with Docker in a browser.
IDE Installation
Docker supports several IDEs. You are encouraged to use any IDE of your choice. However, for consistency, Microsoft Visual Studio is used throughout this tutorial.
Download and Run Sample Project
To get started, follow the steps below to download and then run a sample project.
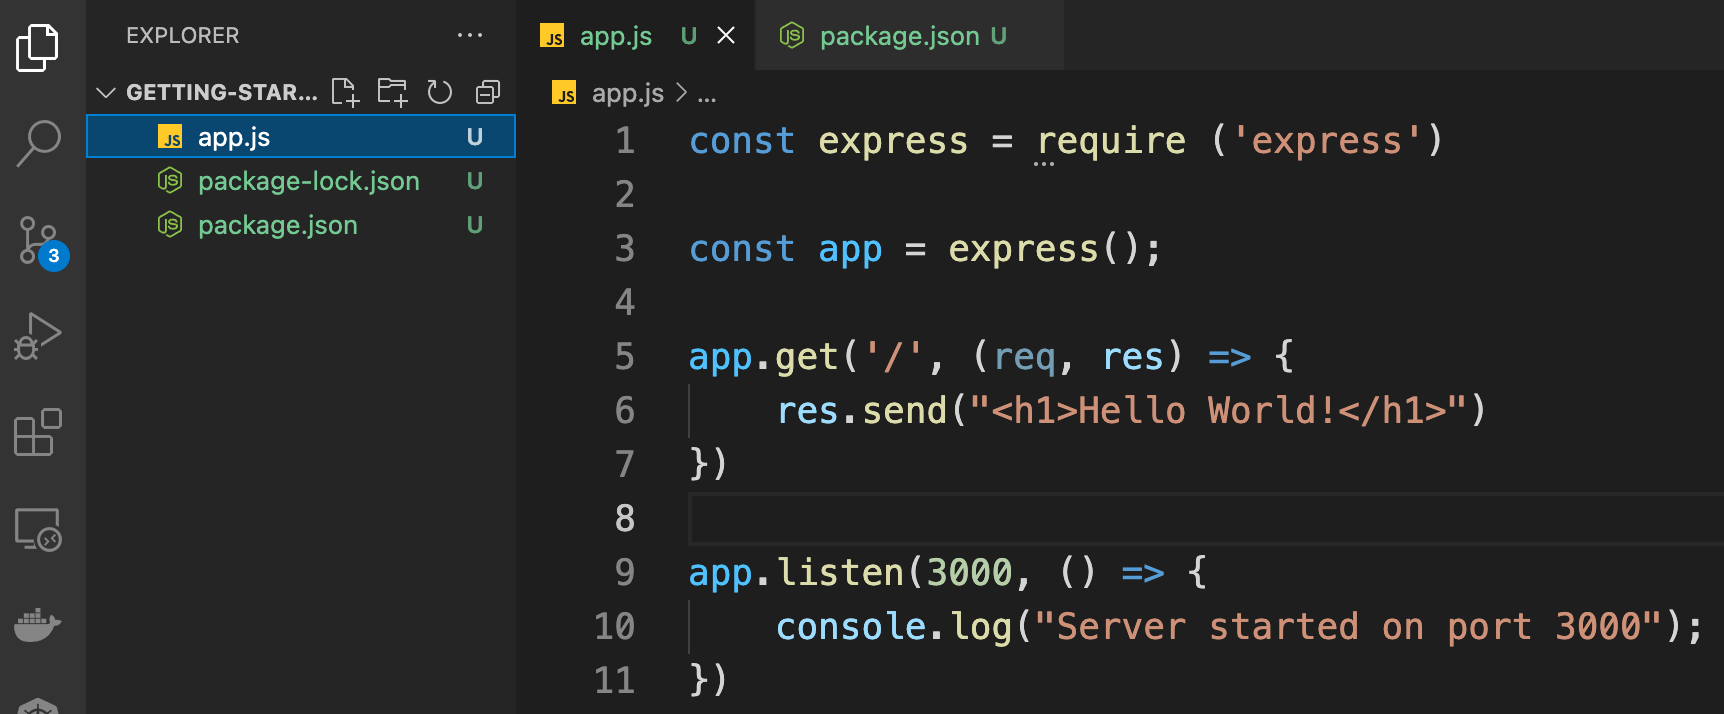
- Clone the sample projects: Navigate to the folder Section1/basic-node-app, which contains the source code for this quick demo. Open the folder with your IDE, and you will see a very simple Hello World NodeJS application, as shown below.
- Run the following commands to start the server of the application:
npm install
node app.js
npm install downloads and then installs all the depencies in the application, while node app.js starts the server on port 3000.
- Open your web browser and then navigate to http://localhost:3000 to visualize the response of the server.
Quick Dive into Docker and Container
Here, we containerize the application and then start the container, the complete dockerized application can be found at Section1/basic-node-app-container.
- Create a file at the root project and name it Dockerfile
-
Enter the following set of instructions in the file.
FROM node:14 WORKDIR /app COPY package*.json /app RUN npm install COPY . . EXPOSE 3000 CMD [ "node", "app.js" ] - Open a terminal and then navigate to the root project.
-
Build the image, i.e., create a Docker image based on the Dockerfile
docker build -t demo-image . -
List existing images to see the new image (demo-image)
docker images -
Start a Docker container based on the new image
docker run -d -p 3000:3000 demo-image - Navigate to http://localhost:3000 in your browser or use Docker dashboard to open the running container. Also, you can list running containers with the following command.
docker ps
Section 2: The Main Building Blocks (Dockerfile, Image, and Container)
Here, we will walk through the steps to containerize a software application with emphasizes on the core building blocks: Dockerfile, Image, and Container.
Dockerfile
A Dockerfile is a configuration file, which can be used to create a Docker image. It comprises a set of instructions that when executed creates an image. Here, we provide a brief explanation of the instructions we used already to create an image with a Dockerfile
FROM node:14
Here we specify the base image (node image, version:14). The base image provides underlying OS architecture and other packages that are required to run our application.
WORKDIR /app;
This instruction specifies the root directory for the image. Hence, all the contents of the image will be stored in the app folder.
COPY package*.json /app
This instruction copies all the files with the name package*.json to the root directory of the image. In our example, both package.json and package-lock.json will be copied to the root directory of the image.
RUN npm install
This instruction installs all the dependencies that are specified in our .json file. Remember that we had to run npm install before running our application.
COPY . .
Here, we copy all contents from the folder that contains the Dockerfile, i.e., the root directory of our project and it is represented as a dot. However, the Dockerfile is not copied though. The second dot is the destination folder inside the image. Similarly, the dot implies that the copied contents will be stored in the root directory (or /app) of the image.
EXPOSE 3000
This instruction simply exposes port 3000 so that we can reeach the application from outside the container.
CMD[("node", "app.js")];
Finally, this instruction runs the containerized application.
Image
An image contains everything required to run an application, including application code, dependencies, libraries, configuirations, and scripts. Also, an image contains other commands for running a container, e.g., CMD [ "node", "app.js" ] is a command to run the containerized node application. To create an image, we run the command below:
docker build -t demo-image .
This command downloads all the required images, e.g., the node base image, if they are not yet cached locally in our system. In addition, the command executes all the instructions that are contained in Dockerfile except some commands that are required to run the container, e.g., CMD [ "node", "app.js" ]. The flag -t tags our image with a name (demo-image). The demo-image can then be used to refrence the image when we run containers based on the image. And finally, the . informs Docker to look for the Dockerfile at the root directory of our project.
Container
A container is an independent runnable instance of an image. A container is light weight, fast, portable, and platform indepenent, to name a few. We can run several containers from an image; however, they are independent and each runs in an isolation.
docker run -p 3000:3000 demo-image
This docker run command instantiates an image, i.e., it creates a new container from the demo-image. The -p maps port 3000 of the host machine to port 3000 in the container. Remember that we specify in the Dockerfile that the application exposes port 3000. Note that both the host port and the container port can have different values.
External Images
Instead of creating our own image, we can run a container based on external image. A Docker Hub is an image registory, which stores repositories of images. These images can be pulled to our local machine and then used to start a container. An example is demonstrated below.
docker run -it node
Remember that docker run creates a new container based on an image. In this example, we are using the node image, which we do not have locally. As a result, Docker pulls the image from the Docker Hub and then creates a new container based on the image. The -it tells Docker to expose an interactive shell from inside the node container to our local machine so that we can interact with the running container.
Managing Images and Containers
Here are some commonly used commands to manage images and containers. You can use --help to explore all the available Docker commands. For example, docker run --help displays all the docker run command options.
docker build .: Build a Dockerfile and then create an Image based on the file-t NAME:TAG: Assign a NAME and a TAG to an image
docker run IMAGE_NAME: Create and then start a new container based on image IMAGE_NAME (or use the image id)--name NAME: Assign a NAME to the container. The name can be used for stopping and removing the container etc.-d: Run the container in detached mode, i.e., output printed by the container is not visible. Hence, the command prompt or terminal does NOT wait for the container to stop-it: Run the container in interactive mode, i.e., the container or application is then prepared to receive input via the command prompt or terminal. You can stop the container with CTRL + C when using the-itflag--rm: Automatically remove the container when it’s stopped.
docker ps: List all running containers-a: List all containers including stopped ones
docker images: List all locally stored imagesdocker rm CONTAINER: Remove a container with name CONTAINER (you can also use the container id)docker rmi IMAGE: Remove an image by name or iddocker container prune: Remove all stopped containersdocker image prune: Remove all dangling images (untagged images)-a: Remove all locally stored images
docker push IMAGE: Push an image to DockerHub (or another registry) - the image name or tag must include the repository name or urldocker pull IMAGE: Pull (download) an image from DockerHub (or another registry) - this is done automatically if you just docker run IMAGE and the image wasn’t pulled before
Introduction to Environment Variable
Environment variable allows you to run the same container based on particular IMAGE but in a different modes or configurations. For example, the exposed container port can be a variable as demonstrated below.
ENV PORT 3000
EXPOSE $PORT
Now, you can run a container based on an image with different ports:
- Create an image based on the dockerfile
docker build -t demo-image:env .
- Run a container based on the image and expose port 8000, instead of the default 3000
docker run -p 3000:8000 --rm -d --env PORT=8000 demo-image:env
- Run another container with environment variable file, port=8000. Note that you have to create a file (.env) at the root project directory and then enter PORT=8000
docker run -p 3030:8000 --rm -d --env-file .env demo-image:env
Sharing Images
Docker images can be shared with your team members, as well as the public and services that you aim to deploy your container to. In this section, we demonstrate how to share and use images with Docker Hub.
- Register with Docker Hub, if you do not already have a Docker Hub account.
- Sign in
- Create a repository.
- Push an image to the repository:
docker push <account-name>/<repo-name>:<tage-name> - Pull an image from the repository:
docker pull <account-name>/<repo-name>:<tage-name>
Section 3: Container Volumes and Bind Mounts
Docker container runs in isolation and when a container stops, all the data that are contained in the container are removed by default. Volume is a Docker built in feature, which allows us to persist our data, e.g., user account details. Volumes provide the ability to connect specific filesystem paths of the container back to the host machine. If a directory in the container is mounted, changes in that directory are also seen on the host machine. If we mount that same directory across container restarts, we’d see the same files. Typically, volumes are folders on your host machine hard drive, which are mounted (or made available or mapped) into the containers.

There are two main types of Docker external storage mechanism: Volumes and Bind Mounts. Volumes are completely managed by Docker, while Bind Mounts are managed by us via our local machines. Docker volumes can be anonymous or named volumes.
-
Anonymous Volume: Only Docker knows the name and the location of the volume in your machine. It is specifically created for a single container. It survives after shutdown/restart of a contsiner, unless the container is removed, then the anonymous volume is gone as well. The command below creates an anonymous volume
docker run -v/app/data [OTHER OPTIONS] IMAGE
/app/data represents the data location in the container. Anonymous volume is predominantly used to lock a memory space, e.g., node_module, from being overriden by bind mount volume. An anonymous volume can be created in a Dockerfile, as well as in the command line. -
Named Volume: The volume has a name; still, only docker knows its location in your machine. The command below creates a named volume - data
docker run -v data:/app/data [OTHER OPTIONS] IMAGE
Named volume is not tied to a specific container; hence, it survives shutdown/removal of a container. A named volume can be removed via CLI. It can be used to share data across containers. A named volume cannot be specified in a Dockerfile. -
Bind Mount: This external storage binds a known directory in your local machine with another directory in the container. It is often used to bind source code with the container so that the image is not rebuilt after every change in the code. The command below creates a bind mount, which connects a known directory (/path/to/code) in our local machine to a container directory (/app/code)
docker run -v /path/to/code:/app/code [OTHER OPTIONS] IMAGE
Bind Mount is similar to named volume, except that its location is known to us, i.e., we can physically locate the directory in our local machine. Note that bind mount requires an absolute path on your local machine, not a relative path or use-v $(pwd):/appfor macOS and-v "%cd%":/appfor Windows. -
Read Only Volume: This features ensures that container can only read from, but not write to, the path in our local machine.
docker run -v /path/to/code:/app/code ...:ro
Volumes that need to be written have to be overriden by bind mount volume. Note that this has to be specified in the docker run, not in docker file.
Hands-On Exercise
Here, we demonstrate Docker Volumes with a sample node.js application.
- Clone the sample project and then navigate to Section3/feedback-volume.
- Run the project as a stand-alone server, i.e., without dockerization of the application.
- Create a Docker image from the application
- Run a container based on the image.
- Run a container with an anonymous volume, restarts the container, and then observe what happens.
- Run a container with a named volume, restarts the container, and then observe what happens.
- Run a container with a bind mount, modify the html source code, and then observe what happens.
- Play around with anonymous and named volumes, as well as bind mounts.
Key Docker Commands
docker run -v /path/in/container IMAGE: Create an Anonymous Volume inside a Containerdocker run -v some-name:/path/in/container IMAGE: Create a Named Volume (named some-name ) inside a Containerdocker run -v /path/on/your/host/machine:path/in/container IMAGE: Create a Bind Mount and connect a local path on your host machine to some path in the Containerdocker volume ls: List all currently active / stored Volumes (by all Containers)docker volume create VOL_NAME: Create a new (Named) Volume named VOL_NAME . You typically don’t need to do that, since Docker creates them automatically for you if they don’t exist when running a containerdocker volume rm VOL_NAME: Remove a Volume by it’s name (or ID)docker volume prune: Remove all unused Volumes (i.e. not connected to a currently running or stopped container)
Section 4: Multi Container Applications
So far, we have been working with single container applications. However, what if we want to add a database to our application stack, e.g., MySQL. The following question often arises - “Where will MySQL run? Install it in the same container or run it separately?” In general, each container should do one thing and do it well. Hence, it is preferred to separate the processes.
Remember that containers, by default, run in isolation and don’t know anything about other processes or containers on the same machine. So, how do we allow one container to talk to another? The answer is networking.
Here, we present three types of container communication:
- Containers talking to external application, e.g., an application running in the web. This type of communication doesn’t require any special configuration or setup. It works as though the application is not dockerized
- Container talking to the local machine, e.g., database running in the local machine. Here, you are required to create a network that comprises our dockerized application and the dockerized database process. This, however, requires a simple change in your url that conects to the database,
localhost->host.docker.internal. Docker understands the commandhost.docker.internal, which it translates to the IP address of your host machine. - Container talking to another container, e.g., database running in a container. Containers can communicte between each other with IP address or via a network with the name of the container.
- Use the following command to retrieve the IP address of a running container
docker inspect NAME|ID
- Use the following command to retrieve the IP address of a running container
Application container can communicate with other container, e.g., mongodb, with the IP address of the mongodb container. The IP address can be gotten with docker container inspect mongodb where mongodb is the name of the mongodb container. The inspect command prints several details including the IP address. This IP Address can be plugged in the url that is used to connect to the database.
Containers can also communicate between one another with network. Docker creates network as follows:
docker network create <network-name> Then use the network name while running the container as –network network-name
Hands-On Exercise
Here, we demonstrate cross-container communication with a sample node.js application.
- Clone the sample project and then navigate to Section4/container-network-starting.
- Run the project as a stand-alone server, i.e., without dockerization of the application. This works if you have mongodb running in your local machine.
- Otherwise, remove the database connection to run the application.
- Create a Docker image from the application.
- Run a container based on the image. Running the container crashes because the container is not configured to communicate with the local machine.
- Replace localhost with host.docker.internal in the database url to allow containers based on the appliocation communicate with the local machine, as well as the MongoDb running in the local machine.
- Run mongo container
- Connect the container to the mongodb with the mongodb IP address
Container Networking
Docker Network allows containers to communicate between each other and IPs are automatically resolved. The command below creates a network
docker network create my_network
This is also called user defined bridge network.
You can specify the subnet, the IP address range, the gateway, and other options. See the docker network create reference or the output of docker network create --help for details.
Use the docker network rm command to remove a user-defined bridge network. If containers are currently connected to the network, disconnect them first.
docker network rm my_network
To disconnect a running container from a user-defined bridge network, use the docker network disconnect command. The following command disconnects the my-demo container from the my-network network.
docker network disconnect my-network my-demo
Unlike volumes, Docker requires to create a network before it can be used. docker network ls lists all the existing network in your local machine. With a network created, a container can be run based as a part of the network. Containers that are part of the network can communicate with just the name of the container.
docker run --network my_network image_name ...
Recall that you need to edit your database url, e.g., localhost -> container_name
Section 5
Docker Compose
Docker Compose is a tool for defining and running multi-container Docker applications. With Compose, you use a YAML file to configure your application’s services. Then, with a single command, you create and start all the services from your configuration, instead of running several Docker commands with CLI.
Why Docker Compose?
Consider this made-up example below:
docker network create shop
docker build -t shop-node .
docker run -v logs:/app/logs --network shop --name shope-web shop-node
docker build -t shop-database
docker run -v data:/data/db --network shop --name shop-db shop-database
This simple example requires a lot commands to execute to run all containers required by this application. Often, you run these commands whenever you change something in your code or you need to bring up your containers again for some other reason. Running these commands may be daunting because you have to memorize and making changes in CLI ius not flexible like conventional text editors.
With Docker Compose, this gets much easier. You can put your container configuration into a docker-compose.yaml file and then use just one command to bring up the entire environment: docker-compose up .
Using Compose is basically a three-step process:
-
Define your app’s environment with a Dockerfile so it can be reproduced anywhere.
-
Define the services that make up your app in docker-compose.yml so they can be run together in an isolated environment.
-
Run docker compose up and the Docker compose command starts and runs your entire app. You can alternatively run docker-compose up using the docker-compose binary.
A docker-compose.yml looks like this:
version: "3.8" # version of the Docker Compose spec which is being used
services: # "Services" are in the end the Containers that your app needs
  web:
    build: . # Directory of the Dockerfile
    ports: # Specify published ports
      - '80:80'
    volumes: # Define any required volumes / bind mounts
      - logs:/app/logs # named volume
      - ./backend:/app # bind mount
      - /app/node_modules # anonymous volume
    environment:
      - MONGODB_USERNAME=ali
      - MONGODB_PASSWORD=secret
    mongodb:
    image: 'mongo' # THe image URL
    volumes:
      - data:/data/db
    environment:
      - MONGO_INITDB_ROOT_USERNAME=ali
      - MONGO_INITDB_ROOT_PASSWORD=secret
# SPecify all the named volumes here
volumes:
  logs:
  data:
You can conveniently edit this file at any time and you just have a short, simple command which you can use to bring up your Containers:
docker-compose up
Docker Compose Key Commands
There are two key commands:
- docker-compose up : Start all containers / services mentioned in the Docker Compose file
- -d : Start in detached mode
- –build : Force Docker Compose to re-evaluate / rebuild all images (otherwise, it onlydoes that if an image is missing)
- docker-compose down : Stop and remove all containers / services
- -v : Remove all Volumes used for the Containers - otherwise they stay around, even if the Containers are removed
Of course, there are more commands